|
|
Post by UK RUSS 1960 OLDS on Oct 27, 2014 23:25:39 GMT
Hi Dom,
The dragster is coming along well now, i guess it is starting to weigh a bit by this stage of the build.
Don't let Nadine see the Capri.
Cheers.
Russ.
|
|
|
|
Post by FordCorsair on Oct 28, 2014 8:01:23 GMT
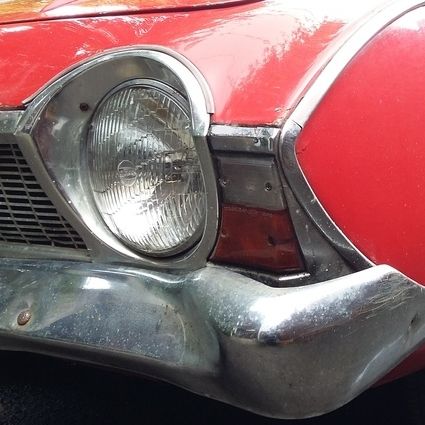
It's ok. Nadine should remember the Capri when it was in it's prime, these being from Oct 1996.   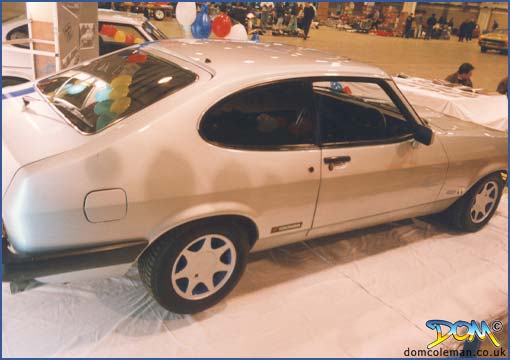 Dom |
|
|
|
Post by FordCorsair on Nov 7, 2014 22:10:34 GMT
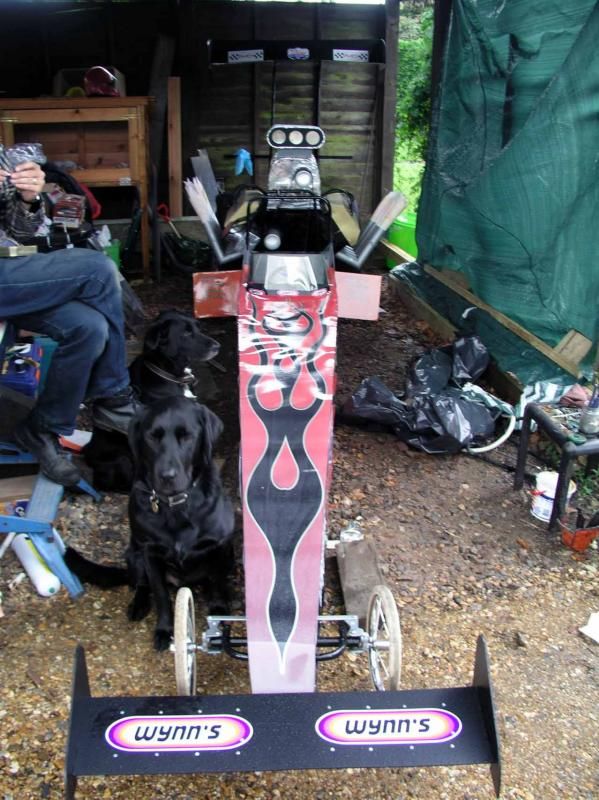
Oops! forgot to post for a week or so... The time frame for the engine build was over about two weeks, the images here show from start to the finished engine. In the evening of one Saturday, the kitchen had become the cardboard engine assembly room. Three A3 paper boxes made the ‘short block’ and later covered in lining paper for an easier surface to paint. Then from a collection of other cardboard boxes the ‘blower’, inlet manifold and other engine bits were made. The bug catcher was made up from foam board with Pringle tube bases for the circles on the inlet; it took a couple of attempts to be satisfied with the shape and then was covered in foil along with the ‘blower’ after rib detailing had been added. 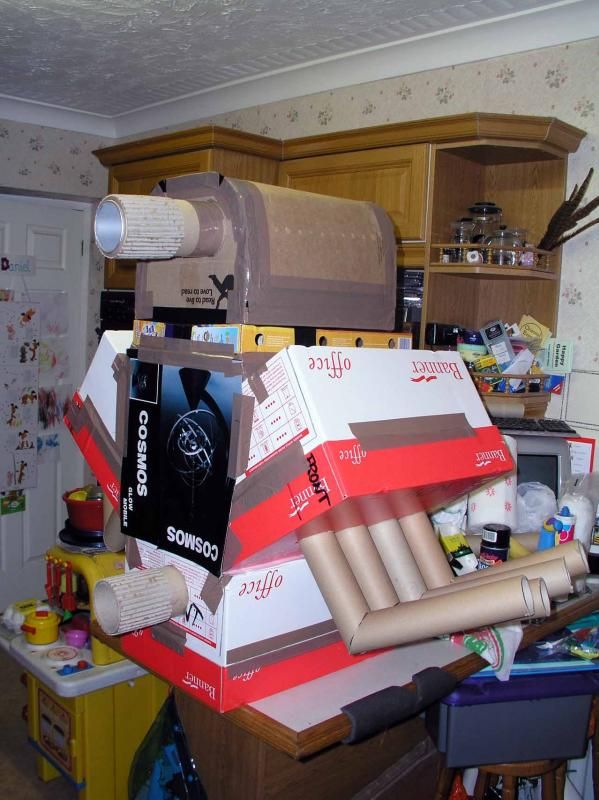 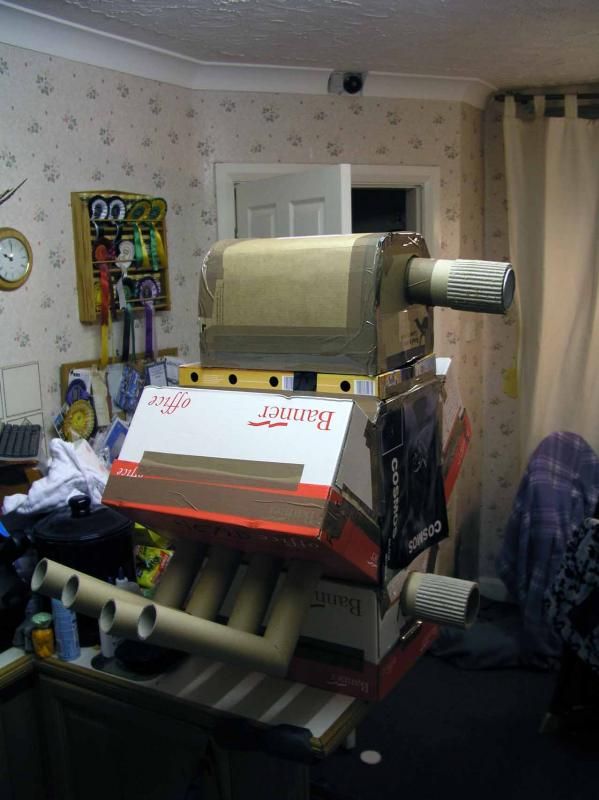 The pulleys were made from heavy duty cardboard tube from the office and the remains of the Pringle tubes were inserted in side. The blower belt and the pulley’s toothed drives were made from carefully separating corrugated card salvaged from the skips at work. They didn’t yield much in the way of quality but were OK once painted. Dug out from the bottom drawer of a plan chest at work I’d found some gold mounting card that was begging to be used. They were cut and shaped to become the rocker covers and were placed on last after the engine had been painted and mounted in the chassis. The pipes looked sh!t here but were better when a metal strip was added to keep them in place. 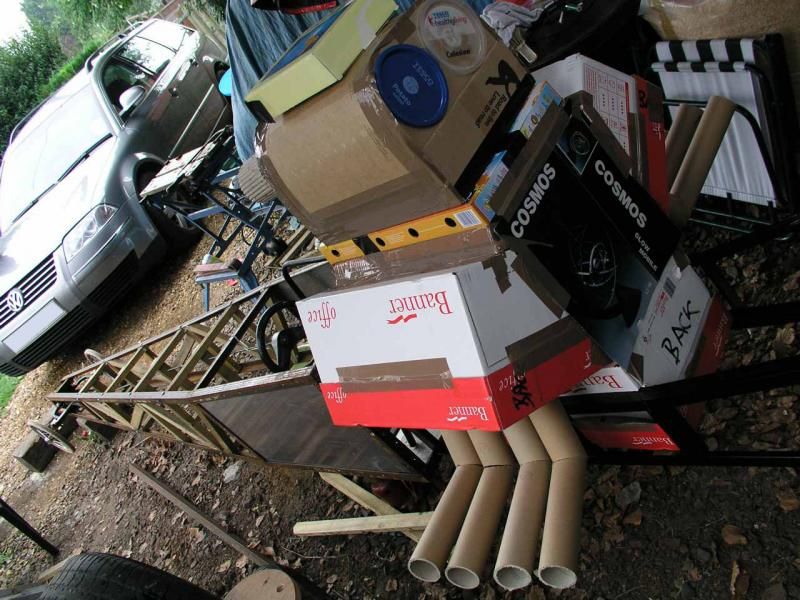 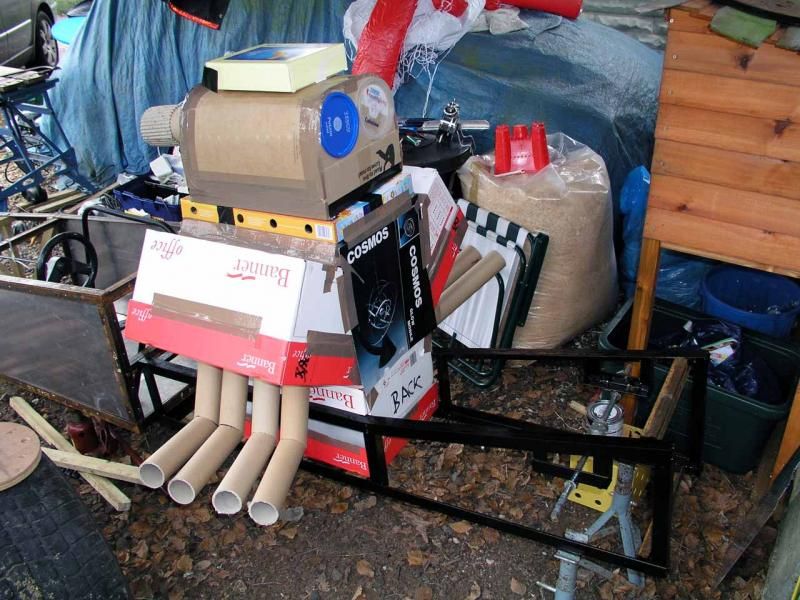 The exhaust pipe “zoomies” were made from tube inserts from the large format paper rolls. They were cut in half approximately at 45° then the pipe turned 180° and glued in place eight times. It was more due to mistakes and breakages and I had to dive back to the office one Saturday morning to make up some more! When the engine was roughly constructed I thought filling it with expanding foam would keep the exhausts in place and give the engine some stiffness, it almost ruined it, as it pushed the exhaust pipes out and made the ‘block’ bulge. I think I re-did the short block as I could get the A3 paper boxes easily enough and the design was simple enough, and I was more careful with the expanding foam this time which held the exhausts better. Later a metal strip was added to the tubes (just like one the real ones!) to hold the pipes shape and their position. The exhausts were probably the hardest part to get looking sort of right. 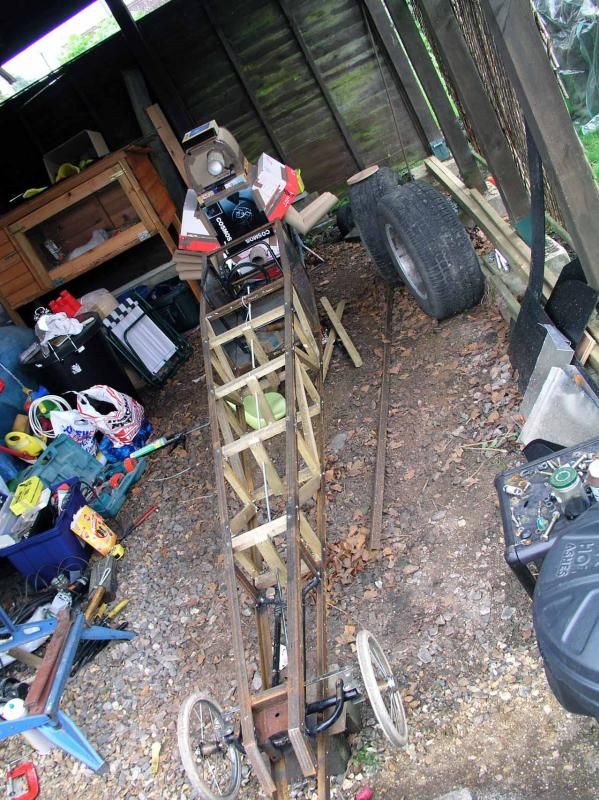 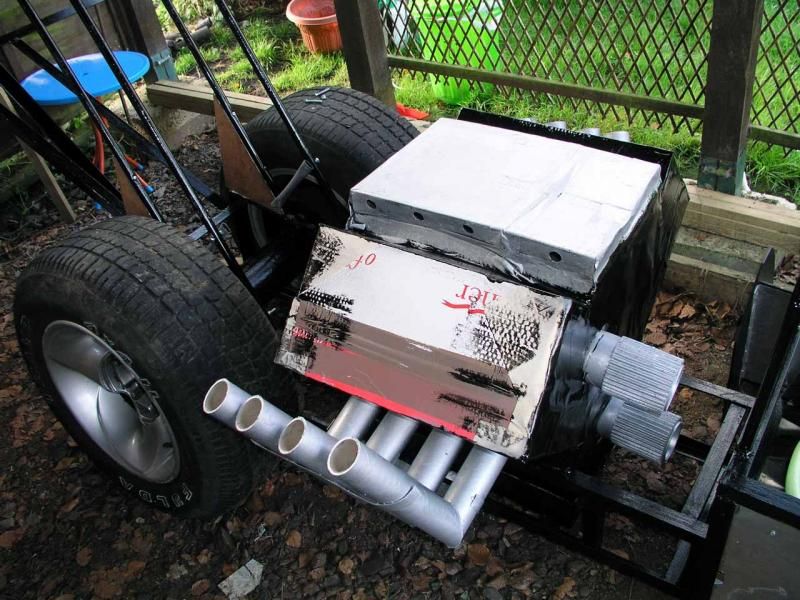 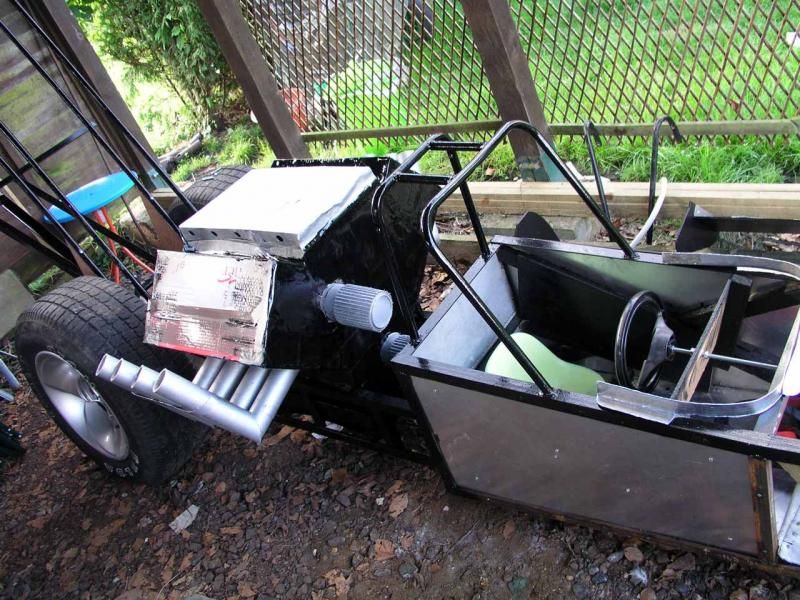 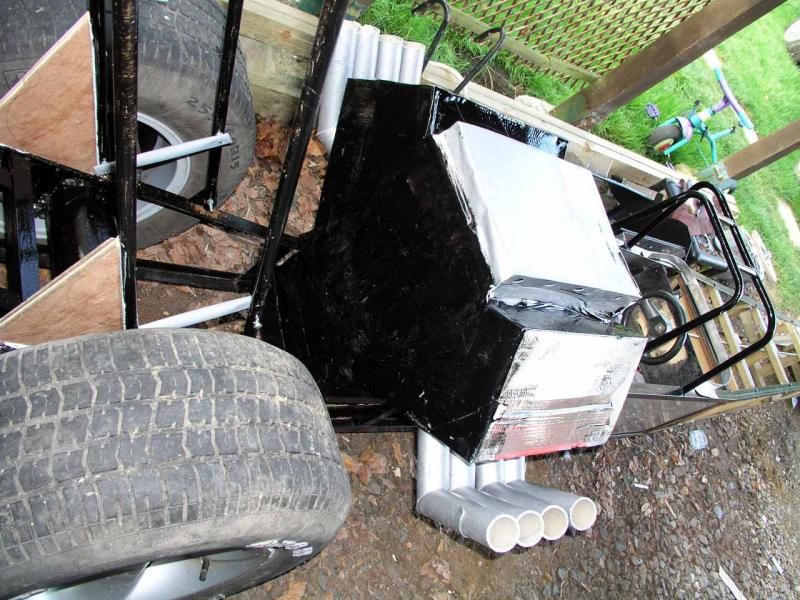 The finished engine in place in the last week: 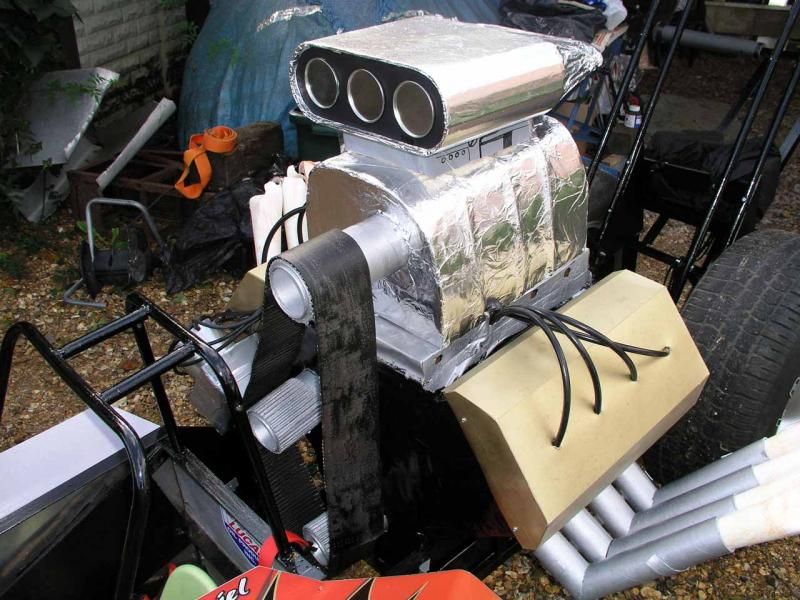 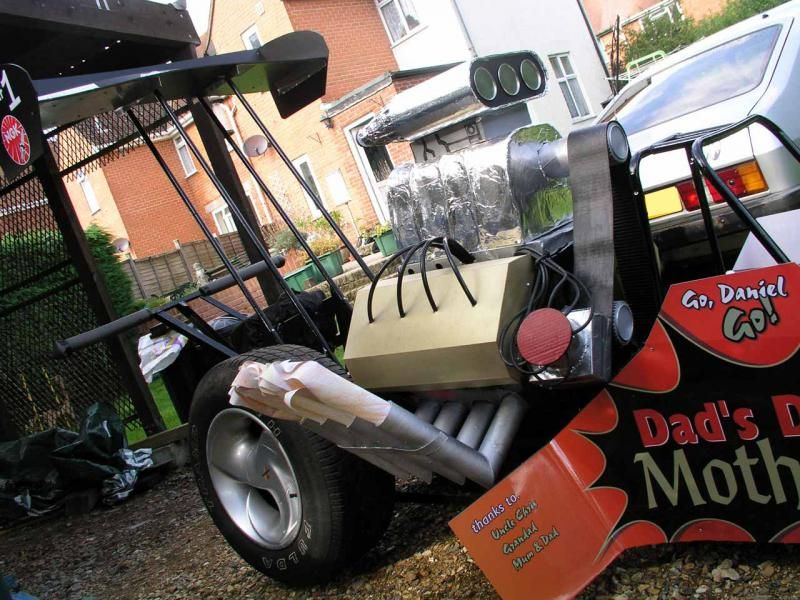 It really should of had two magnetos for Top Fuel, but technical problems of fitting i.e. space was the problem, so went the Top Methanol route instead. The wife went to the scrappy for me and got a fist full of old plug leads and I got some other cabling from work (where else!) for the plug leads. Next update; soon. Dom |
|
|
|
Post by UK RUSS 1960 OLDS on Nov 7, 2014 23:21:58 GMT
Hi Dom,
The dragster has really come on now that the engine is in and the side paneling is on.
I can't wait to see the whole dragster in it's finished guise.
Cheers.
Russ.
|
|
|
|
Post by FordCorsair on Nov 16, 2014 20:35:28 GMT
The graphics were mocked up using my earlier drawing created for scaling and working out the chassis. The wife and I had come to naming the car quite early on in the project and we thought it would be very apt to call it, “Dad’s Dream, Mother’s Nightmare”. Daniel wanted the dragster to be mainly red and that was my brief for the body panels. 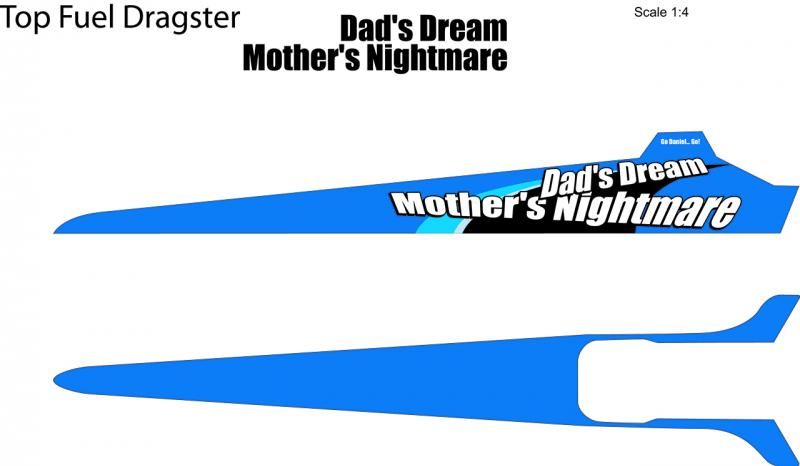 the first incarnation was a bit lame... 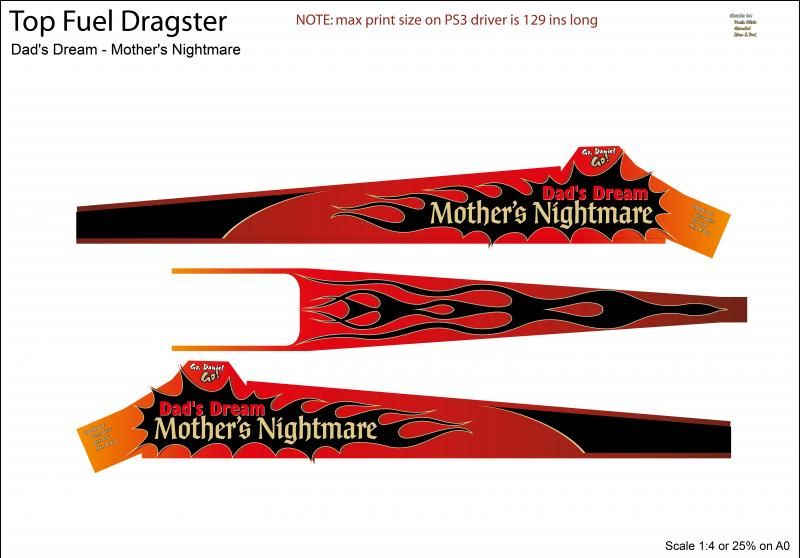 A more serious attempt and the final design. What you see here was the print file. 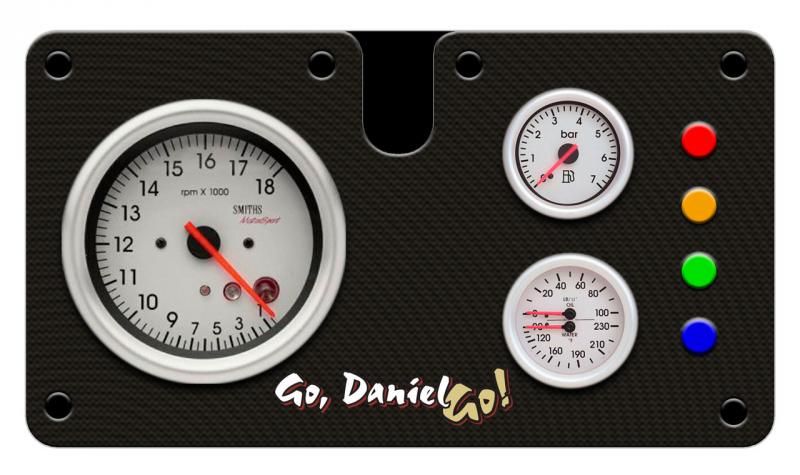 Dashboard - Yes, that's a water temp and fuel gauge!!! My research wasn't that in depth! The other graphics job was the dashboard console. I made up a carbon fibre effect background and placed on the images of the clocks and buttons. This was mounted on to foamalux board, a plastic based board that was flexible, easily cut and not too heavy. More of this material was used to make the front and rear wings. The small plastic seat was just about big enough for Daniel’s derriere and the steering wheel were from the go-cart. An old sports bag strap was used for a harness and a lever was added for effect but had no practical use. 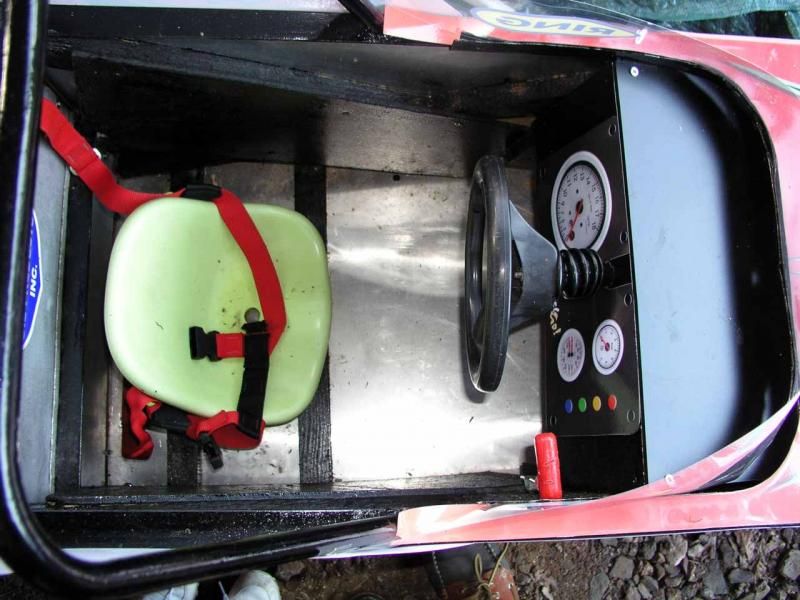 The Office  The front and rear wings were made from black foamalux. I thought it would be quite sturdy, waterproof and easy to shape and cut. Unfortunately the material was a bit to bendy, and the rear wing needed some extra bracing which sort of worked but when viewed from behind you can see the distortion. The front wing needed strengthening too but was a bit easier to work with and lighter. 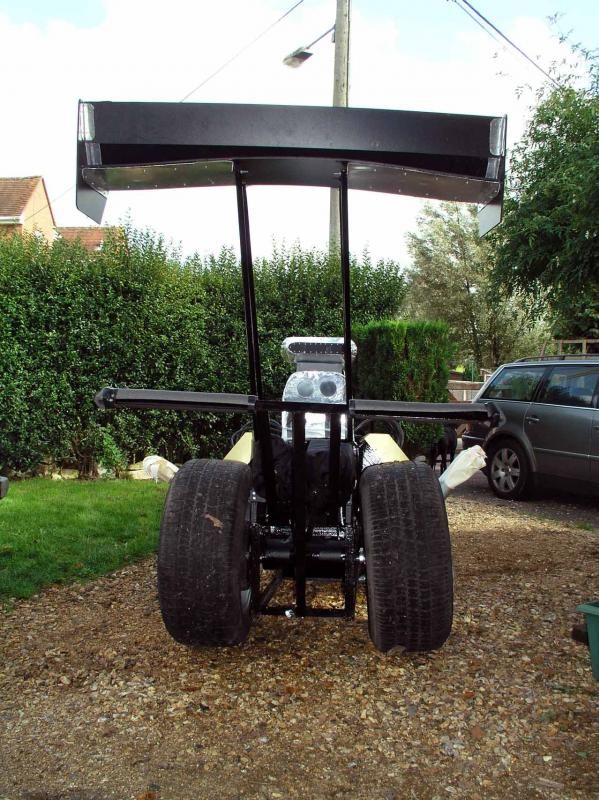 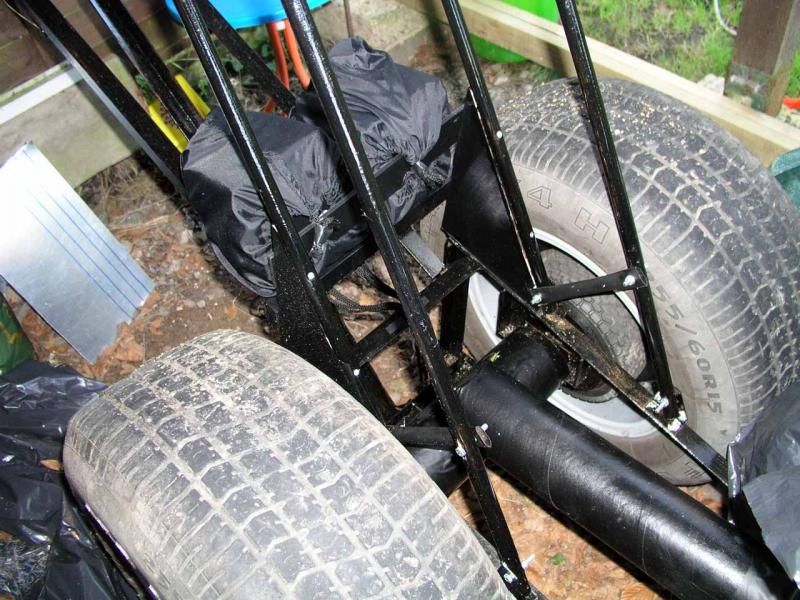 Rear wing struts needed extra bracing, also note parachutes The handmade crash helmet was completed by now with old cotton nappies (clean) padding for the inside with black liner, spray painted red and insulation tape added for edging detail. 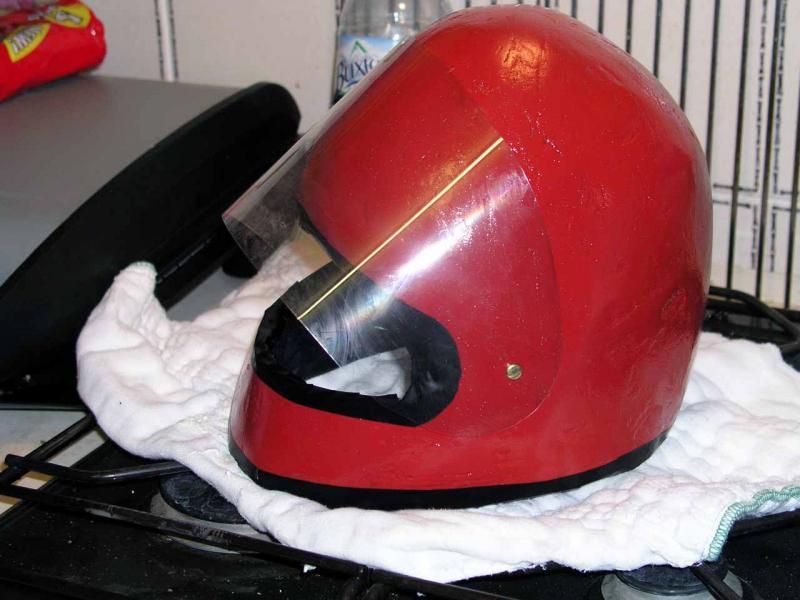 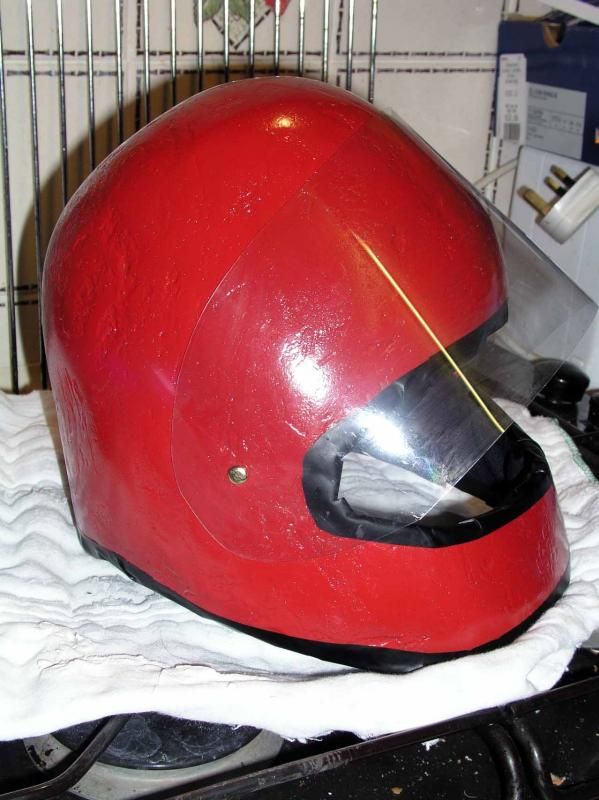 A couple of weeks earlier I had been back in touch with Andy Carter about getting some authentic sponsor decals to go on the dragster of which he was most obliging and posted to me (along with a signed ‘ hero card’) at his own cost. Also, I had Luke Bennett from Bennett Racing rummaging about in their race truck for sew on badges but he couldn’t find them until it was too late, but I was very thankful for his efforts. Next and last installment is the lead up to the carnival and the day its self. Dom |
|
|
|
Post by UK RUSS 1960 OLDS on Nov 16, 2014 20:43:28 GMT
Hi Dom,
Thanks again for posting up more of this project, i have enjoyed reading and looking at each instalment.
Now waiting with baited breath for the grand finale.
Cheers.
Russ.
|
|
|
|
Post by FordCorsair on Nov 16, 2014 21:35:32 GMT
Cheers, Russ.
I'll give it another week... and then post the last bit. Glad you're enjoying it!
Dom
|
|
|
|
Post by UK RUSS 1960 OLDS on Nov 16, 2014 21:38:14 GMT
Hi Dom,
I am sure there are others enjoying it as well, a shame they havn't posted and acknowledged it though. Your thread has had quite a few views now.
Cheers.
Russ.
|
|
|
|
Post by FordCorsair on Nov 23, 2014 21:54:01 GMT
 Nearly there, taking a break on the morning of the carnival. For the final week of the build it was almost a full time 7 day thrash, I think I made a couple of guest appearances at the office for printing the body panel artwork and also to use the large format laminating/encapsulation machine so the prints could be waterproofed. This also added extra strength as the side panels were to be pop riveted on. I also obtained a roll of magnetic sticky tape; this was so the top body panel could be held in place by the magnets but lifted up to gain access to the chassis and steering mechanism, especially as the steering rods would pop out (on full lock) of the little loop on the horizontal bar that was on the front axle. Also, it allowed for me to attach a hook on the front axle for lifting the front of the dragster to make manoeuvring easier and also for negotiating any difficult corners on the carnival route. Clear acetate was used for the wind shield; that was difficult to shape correctly even when I tried a cardboard template, good job I had lots of it! 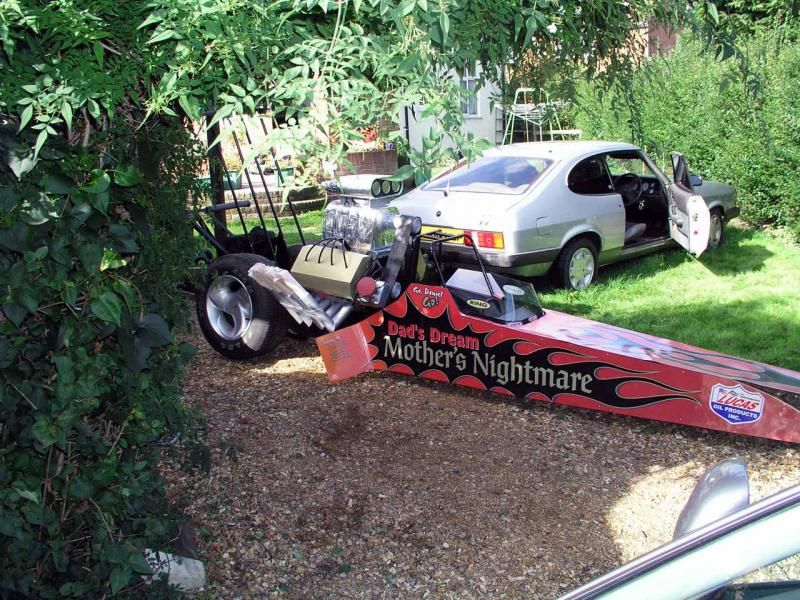 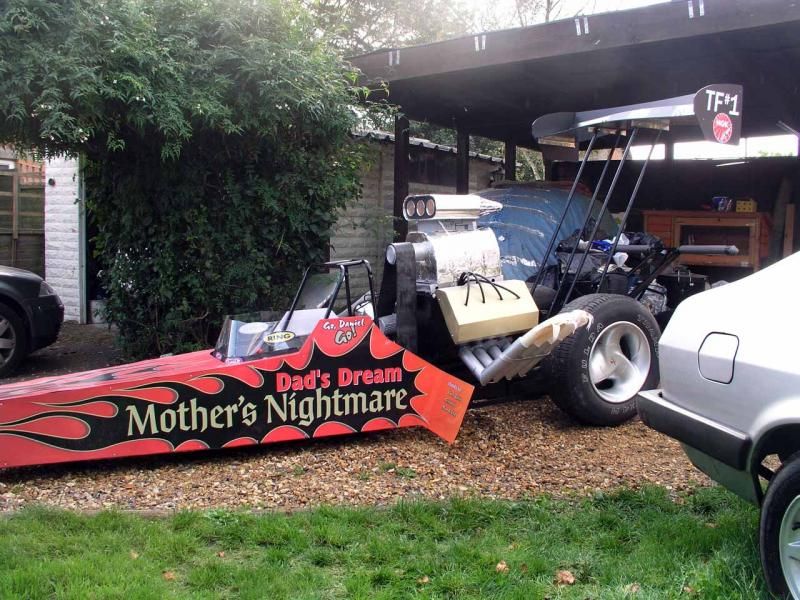 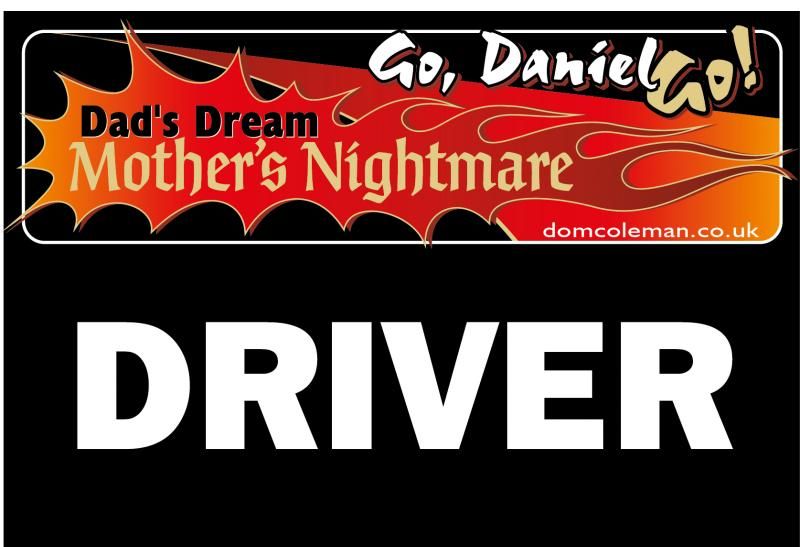 Iron-on graphics were created (work printers again) from some left over special transfer paper I had from an old job. I only had four A4 sheets, so only room for one muck-up as we only had three overalls to add the graphics too. They were driver, crew chief and crew. On Carnival day it was becoming very damp and overcast and the wife and I were applying the final touches and stickers to the dragster about half hour before we had to leave for the procession! It struck me while pushing the dragster to the Children’s Carnival start point that this was going to go down well when we had a group of boys gather around our ‘hand-cart float’ and saying some very complimentary stuff. 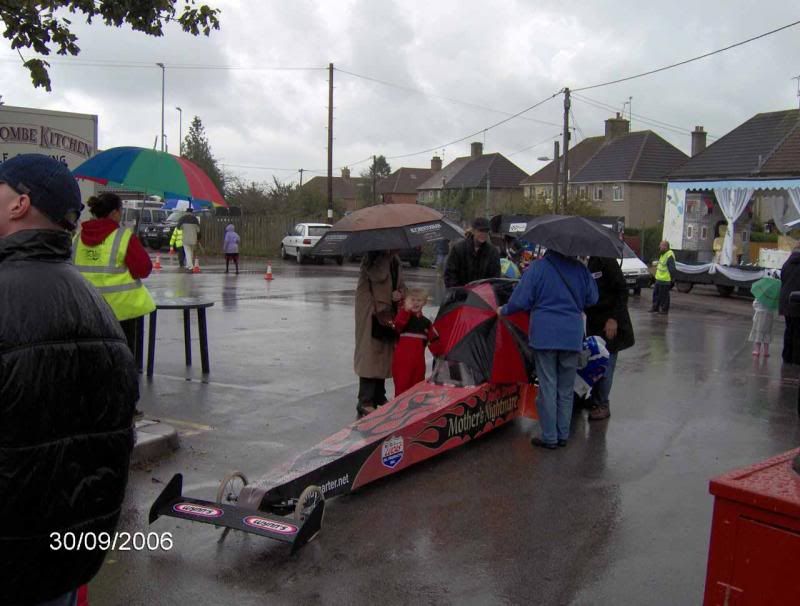 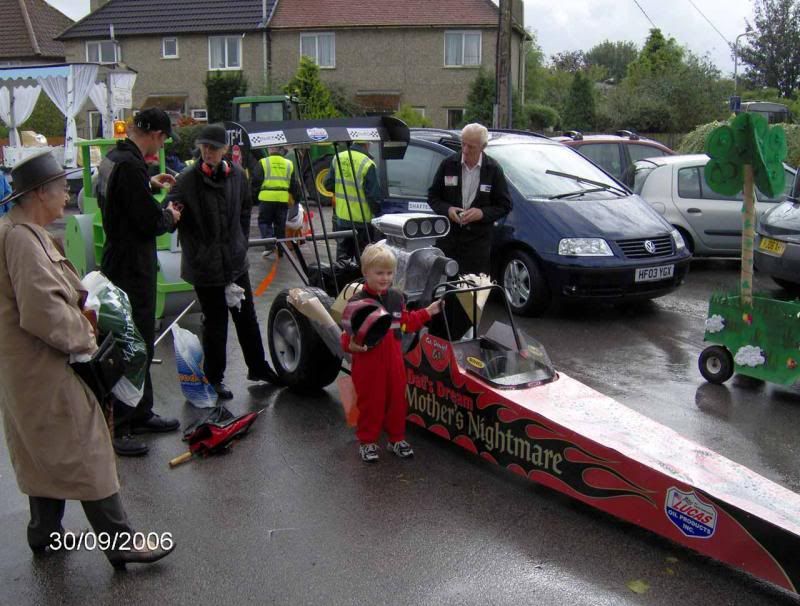 In the judging area the weather that had been threatening to break all day eventually came down in a downpour. I was still checking things were in place on the dragster and answering the many questions about drag racing that I didn’t really notice the judging had taken place until we got a call to attend the presentations. Only then did find out that we won the Hand Cart class beating the Bob the Builder road roller from Sturminster Newton which was rather good and the one to beat. 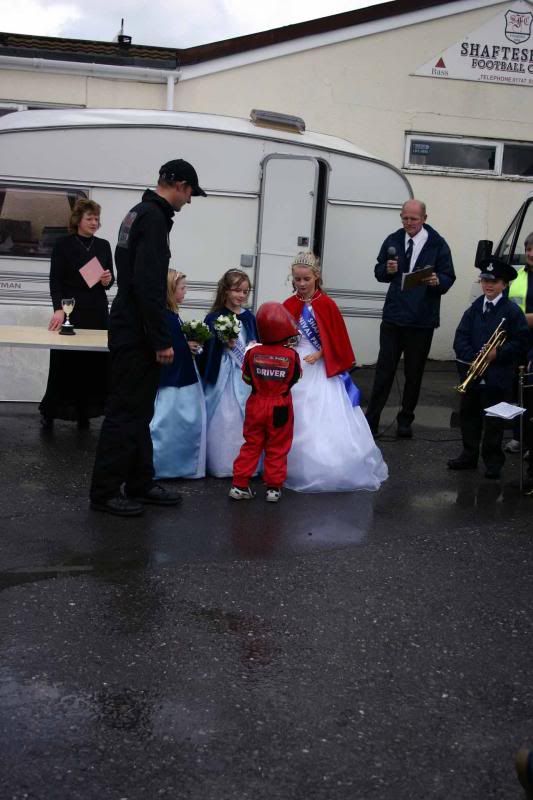 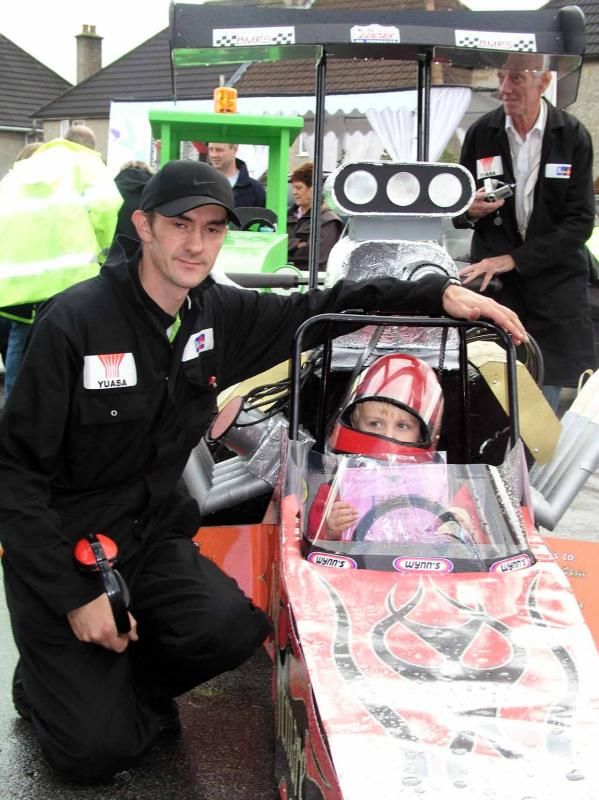 The sun had come out in time for the procession and the town was packed with spectators. The dragster need a lift up at the front to get around a couple of tight corners and later developed a rear wheel nut loosening problem half way around. After about an hour and a half on the procession we were home and Daniel enjoyed himself but wanted to go to the fun fair. 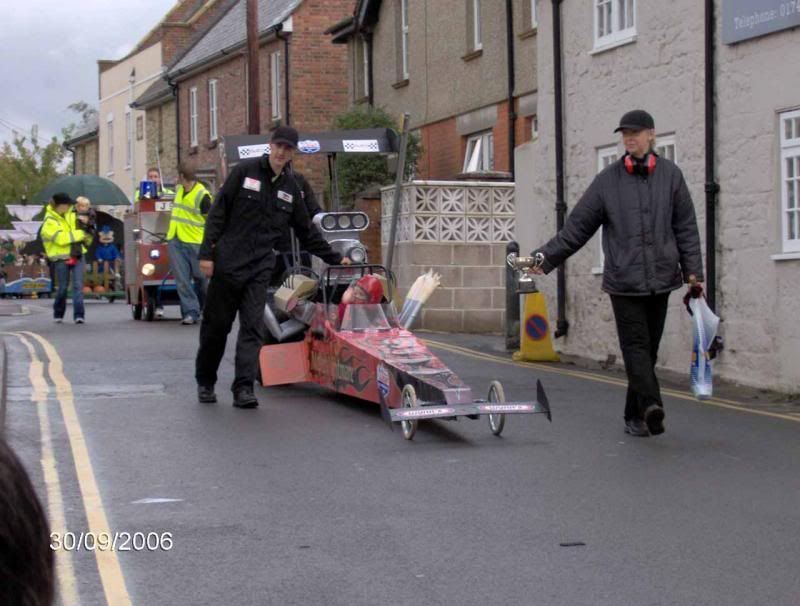 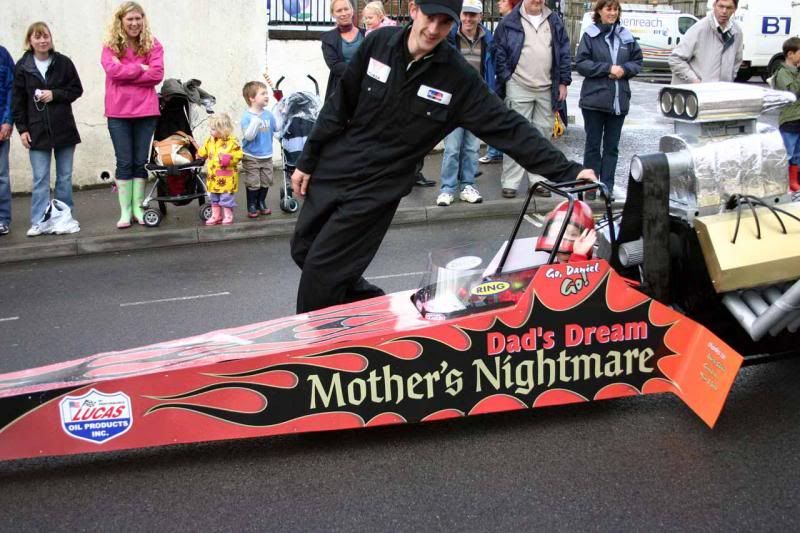 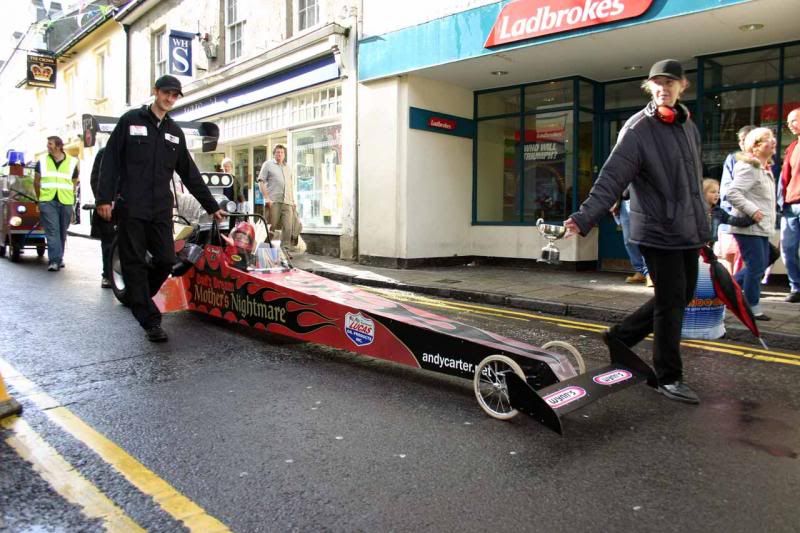 With Daniel being worn out and the wheel nut problem we didn’t go in for the evening procession, however I saw it as mission accomplished and that was it for the Carnival Dragster.  Thank you for viewing, I hope you enjoyed the thread. Dom |
|
|
|
Post by fzr400exup on Nov 23, 2014 23:52:56 GMT
hello dom
i have been reading this each time you have added bits to it i am one of the guity ones russ was on about for not making any comments before
i bet the smile on your boys face was all the thanks you needed for all the effort you went to
oh i am one of russ cousins by the way
jon
|
|