|
|
Post by FordCorsair on Oct 13, 2014 20:19:18 GMT
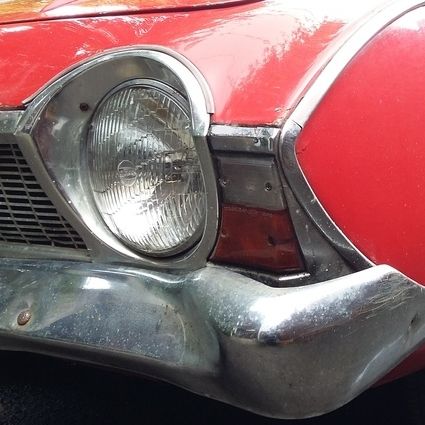
The following story has been posted elsewhere, in case it seems familiar to some... The Carnival Dragster – January to September 2006It started as an idea by my wife, who couldn't sleep one night in January 2006. She wondered what we could enter our son, Daniel, in the local town Carnival that occurred annually at the end of September each year as he would be approaching four by then. Shaftesbury carnival is part of the Wessex Carnival Circuit and is split into two processions; the Children’s procession in the afternoon which was the main focus for us and then the main evening 'Illuminated' procession from 7pm.The evening procession had the large club floats of the Wessex Circuit and sometimes one or two from the adjoining Somerset Circuit.  pinched from the Blackmore Vale magazine  borrowed from hereBut to get me interested she wondered if I'd build a dragster themed float or hand cart that we would push or tow along. Well my over active imagination took over upon hearing this and immediately went to the funny car/fuel altered type dragster that looked a bit like one of my lads Hot Wheels cars (photo of Hot Wheels bantam). I was considering sound effects, lights hidden in the headers for the evening procession, fans to blow flame effect fabric from the headers, neon’s or florescent tubes under the body and all manner of exotic ideas.   ref: danielcoleman.co.ukI chewed over this for a few days leading to weeks thinking what would be practical for me to build. How should it be made; perhaps with a wooden frame and cardboard panels? Maybe I could modify a pedal go cart with some sort of body to wrap around it? Pram wheels with cardboard dummied up to look like slicks. However, I had a slight problem with my limited fabrication skills or even ‘making anything’ skills so; creating a rear engine rail type dragster would probably be the easiest route. I'd seen fairly good computer rendered schematics of top fuel dragsters on the web that were inspiring which also simplified the complexities of the design and proportions. By February I was sketching ideas and then I sent out emails to two chassis builders and Andy Carter for help with drawings or schematics of TMD or Top Fuel Dragsters. Next installment will reveal the next step. Sorry I've lost or misplaced the sketches, if I find them, I'll post them here. Dom |
|
|
|
Post by UK RUSS 1960 OLDS on Oct 13, 2014 23:13:45 GMT
Hi Dom,
I am looking forwards to the next instalment of this thread.
Cheers.
Russ.
|
|
|
|
Post by FordCorsair on Oct 14, 2014 19:45:42 GMT
It's already written, I'll give it a few days before I post up another...
Dom
|
|
|
|
Post by UK RUSS 1960 OLDS on Oct 14, 2014 20:10:12 GMT
Hi Dom,
No worries, i will keep my eyes peeled.
Cheers.
Russ.
|
|
|
|
Post by FordCorsair on Oct 17, 2014 19:46:53 GMT
So the next stage...A few days later I got an email from Andy Carter saying he couldn’t contact me on my mobile number (as I had got the digits mixed up), but with the numbers sorted I was soon talking with THE Andy Carter, FIA Top Fuel… well most of you will know the rest or just Google him. Sounds really stupid but I was a bit star struck talking to Andy but he really was helpful and passed my details to John Andrews who was his PR person at the time. John emailed me large resolution images of the B&Q liveried computer rendered drawings of the Top Fuel dragster from which I was to create my dimensions and proportions for the scaled version to fit around Daniel. 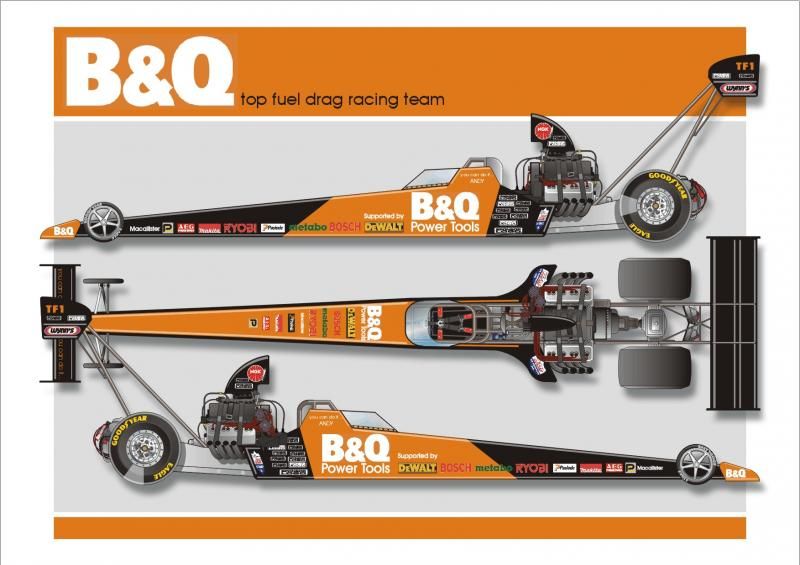 The planning had begun with measurements taken of Daniel in a sat down position and a simplified figure drawn using Adobe Illustrator. I then imported the Andy Carter supplied dragster rendering and scaled up the image around Daniel’s scaled sat down posture dimensions. I then traced in Illustrator, over the drawing to create a roughly 1:1 version of the dragster to make up a ‘blue print’ to build from. It was from this drawing that enabled me to estimate (more like guess) the quantity of materials to build and use. 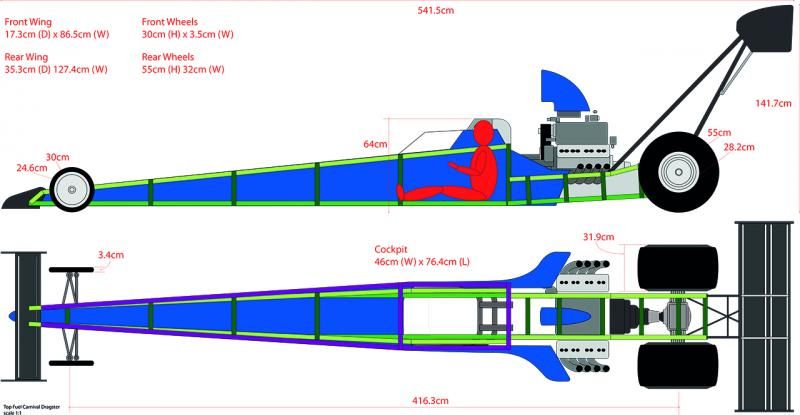 The next installment soon... Dom
|
|
|
|
Post by UK RUSS 1960 OLDS on Oct 17, 2014 23:25:06 GMT
Hi Dom,
This is all looking very interesting, you have got my undivided attention.
I remember Andy Carter from when i used to race back in the 90's, pretty sure he was racing a Pontiac powered ?? Ford Pop back then, all a long time ago so the memory is getting a bit vague now.
Cheers.
Russ.
|
|
|
|
Post by FordCorsair on Oct 20, 2014 20:41:41 GMT
By Easter (April) I had the money to buy 30 metres (in 5m lengths) of 30mm angled steel from a local steel dealer (Dyfed Steel) at cash rates and then a trip to Travis Perkins on my brother-in-law’s account (mates rates); 30 metres (again in 5m lengths) 50x25mm batons a load of nuts and bolts, wood glue and fresh hacksaw blades and some help from my brother-in-law’s van to collect. Working within the graphic design environment I was fortunate enough to have access to a large format printer, so was able to print my chassis design at 1:1 scale. Though the maximum length I could print at the time, due to basic print software, was 3.4 metres so I had to output in two parts, which I had to bear in mind for later. With an area cleared on the patio the chassis/drawing print was laid out (a dry day was needed) and then my angled steel was cut by hacksaw and placed on the drawing to ensure I got sections cut to the right size in the right places. I was a bit unsure if I’d get an accurate cut with the angle grinder (didn’t have a cutting disk) and was conscious of drawing attention to myself and annoying the neighbours, so all the chassis sections were hack-sawed by hand, also Daniel didn’t like the angle grinder, it was too noisy. 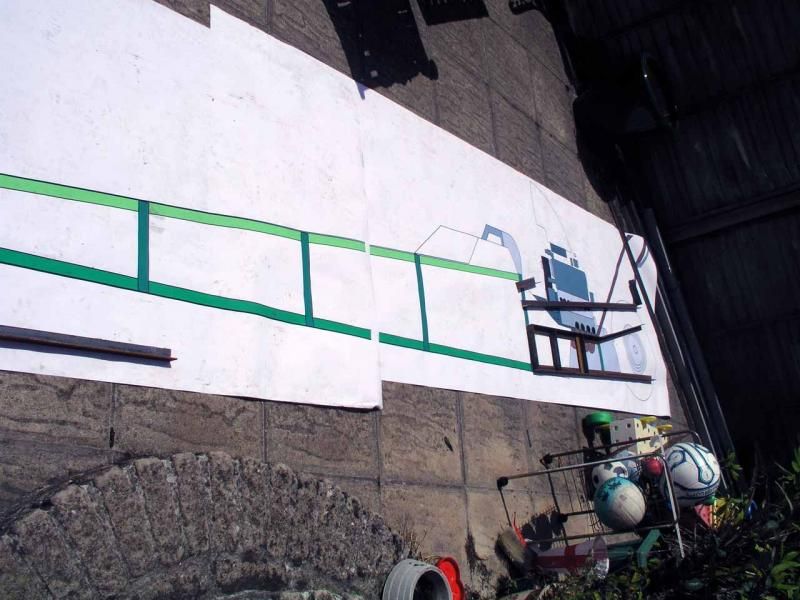 The build went quiet from April to June but I was still in hunter gatherer mode. Early one morning I spied a kids pedal go-cart put out for the bin men across the road from our home but it was soon in my possession and many components were ear-marked for the dragster. I also bought an ‘old style’ pram frame from the recycling centre for a couple of quid that I’d seen in their metal skip, mainly to obtain wheels and hubs for the dragster. My brother-in-law also provided the rear wheels that were off a Suzuki Vitara he had recently sold and use of his power tools. ...more to follow. Dom |
|
|
|
Post by FordCorsair on Oct 24, 2014 19:49:59 GMT
It wasn’t until late June that I started welding the frame for the dragster with some long gaps of inactivity and it was Wednesday 16th August before I resumed the welding of the frame on a day when I had the patio to myself and a Heathrow trip in the afternoon. I carefully followed my drawing for guidance ensuring the left and right sections mirrored each other as best as I could and by midday my welding had improved and I had the basics of a chassis made up. With six weeks remaining (Carnival day was 30th September) work on the welding was slow but the angled steel chassis was done with wooden bracing being cut and fitted by the end of August to add rigidity. By this time, I had about 5 weeks to go until the carnival and only had the chassis with bracing done and the front and rear axles mocked up. 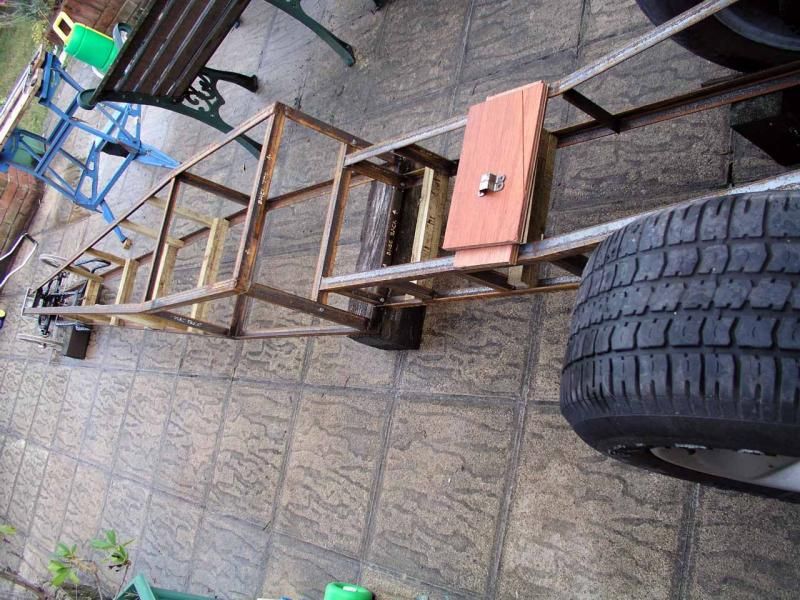 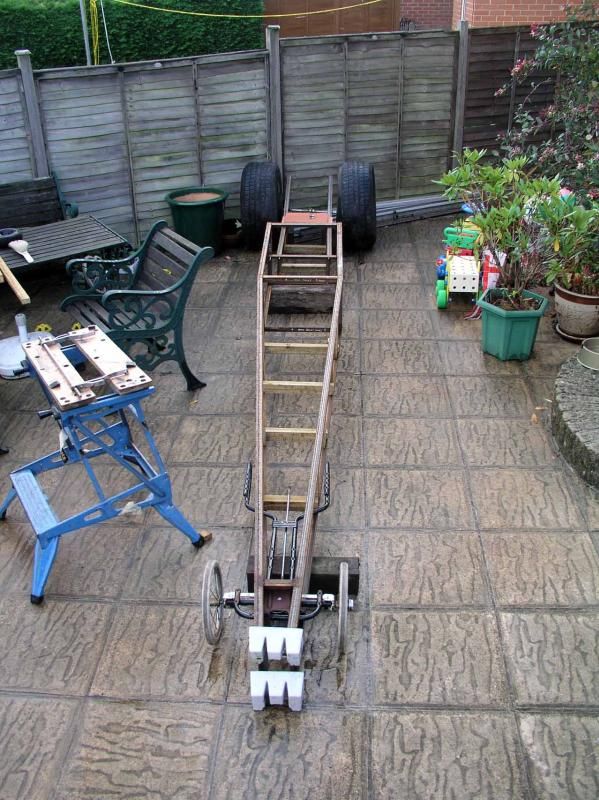 Above: Above: You may be able to see the pram axle on the work bench before it was chopped up some more and also most of the go-cart chassis was in intact and mocked up at the front, I didn't want to take too much off. Plastic bits at the front of the chassis was to prevent catching our ankles on it as it was in the walk way from the back door to the garden. This point was around the last week of August. 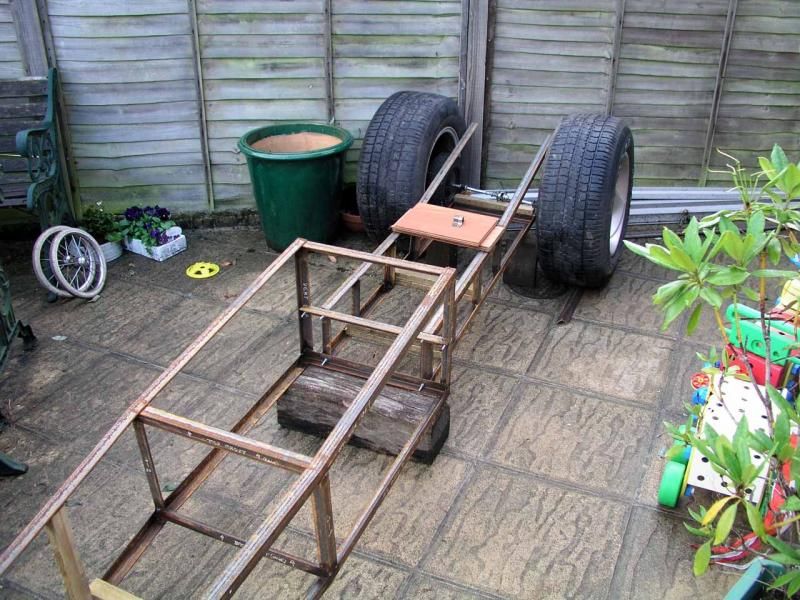 The pedal go cart was soon chopped up. The front axle with the steering mechanism was cut off the cart and to fit the larger pram wheels, which had a neat quick release device to remove them off their axle. This allowed for easy access to the spindles which were cut up and adapted to fit then welded on to the go-cart hubs (if you can call them that). The rear axle of the go-cart was to be used too as it had the original wheels adapted to be hubs for the rear wheels. The axle was a bit flimsy but was only needed to support the weight of the rear frame and the original mounts were used to attach it to the chassis. The steering mechanism and seat where also salvaged from the go-cart. One thing to note about the chassis was that I had designed it to be split just behind the driver compartment. The original plan was that we were to enter the Blandford and Gillingham Carnivals (which were either side of Shaftesbury’s) and it needed to fit on the brother-in-law’s digger trailer to be transported. 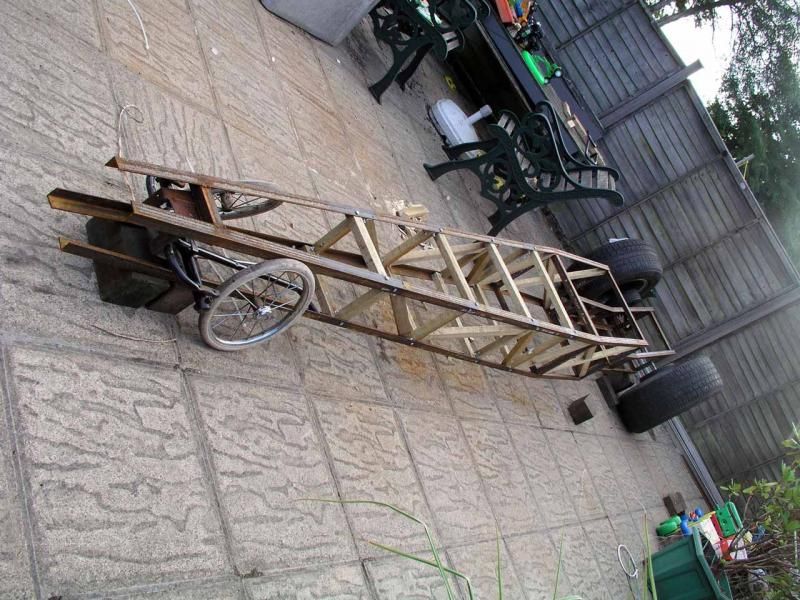 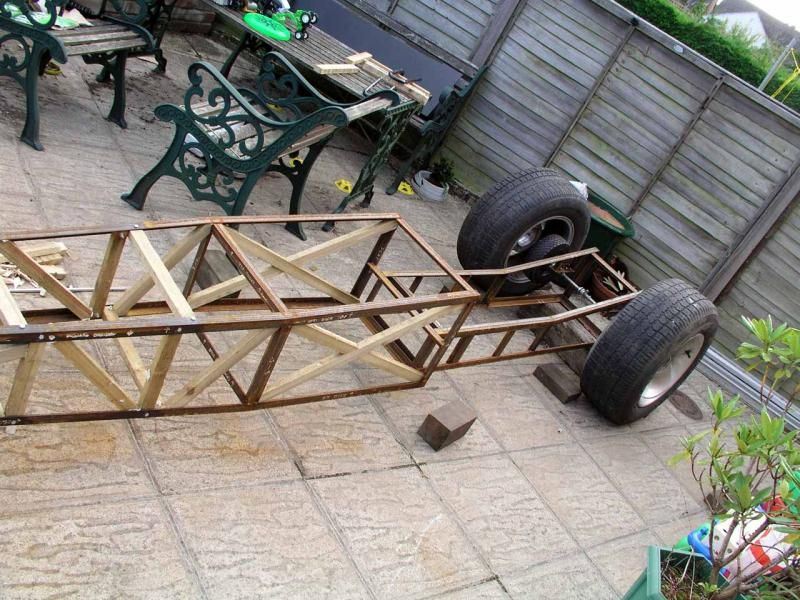 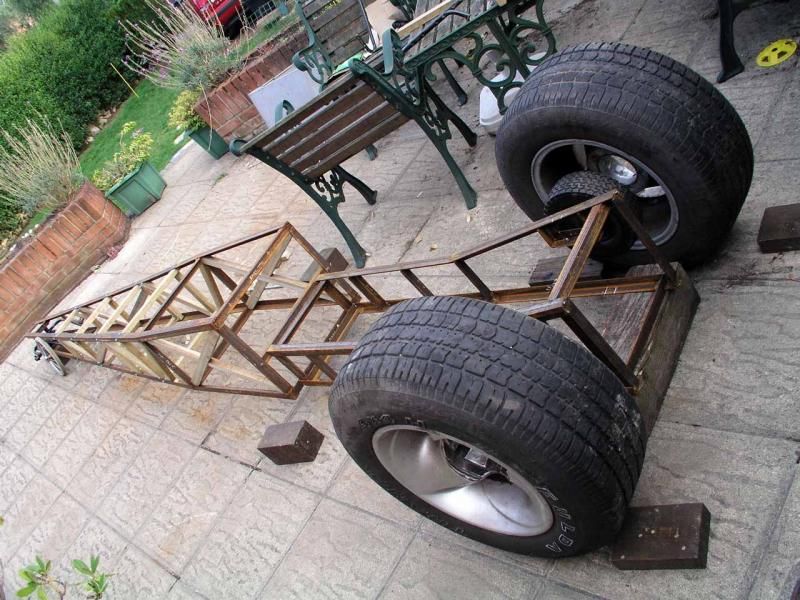 Through the summer months Daniel’s mum had him drive his battery Ferrari to and from town and to the local supermarket, even being allowed to drive into the store! This was training for him for when the time came to steer the dragster around the streets for the carnival. The trips to town would be up to about a mile and half round trip and the little battery in the car lasted well, and no, I hadn’t considered chopping up his battery car!  The pressure was mounting, and a curious visit from my mother and step-father spurred me on to succeed. I got the impression they didn't believe I would finish it, "just Dom and another of his head-in-the-cloud ideas". Dom |
|
|
|
Post by UK RUSS 1960 OLDS on Oct 25, 2014 12:30:49 GMT
Hi Dom,
That's looking good, really starting to take shape now.
Cheers.
Russ.
|
|
|
|
Post by FordCorsair on Oct 27, 2014 21:51:10 GMT
Hi Russ, as I look back, i didn't realise how much time and effort was put in to this and I still quietly proud of the achievement. Unfortunately I haven't done anything like it since... Anyway a bit more. I was on such a roll at this point that much was happening simultaneously, so I've tried to break it down into sections. If I was outside I was working on the chassis, if I was in the house (kitchen) it was designing/building the engine or if I was at work I was designing the graphics needed. The kitchen door was festooned with dragster engine pictures for inspiration of the engine build. As mentioned earlier, the original go-cart rear wheels were converted into hubs. Being made of plastic they were sandwiched with wads of plywood for extra strength and also to act as spacers ensure the Vitara wheels cleared the chassis. Then they were drilled (only three holes) to take new 16mm threaded bar for the wheels to fit onto. The threaded bar diameter seemed just right for the holes on the Vitara wheels but really was a bit too big as the nuts (approx 22mm?) were a bit awkward to do up but I didn’t think that at the time when buying the threaded rods. 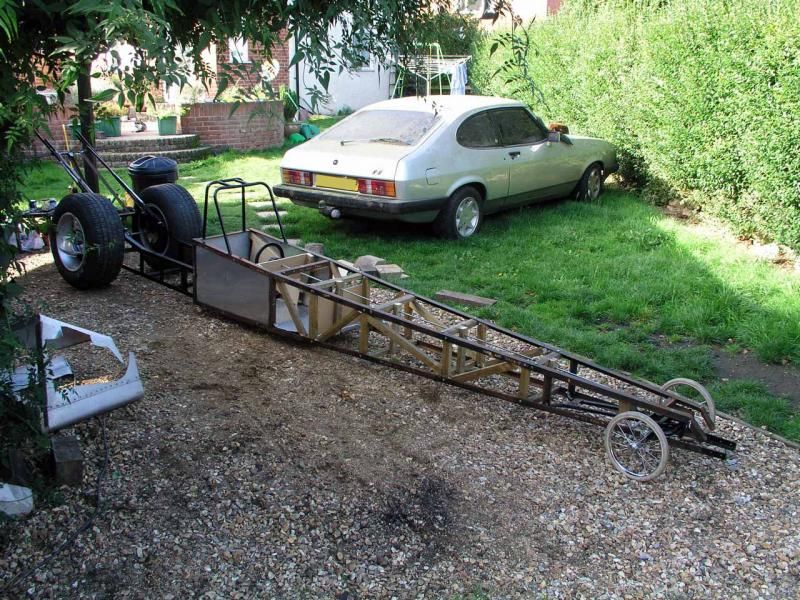 Hedge and lawn looking neglected...  With about 4 weeks to go and into early September the chassis construction had out grown the patio and the carport was looking like the next place to carry on the work and was shelter from the damp night air. Being nearly 5m long, including the push bar, the dragster fitted perfectly in the space vacated by my Capri (now on the lawn) with plenty of room to work either side of it. Things started to really take shape and at some pace and with some extra hands-on help from my father-in-law. By now the wife had started making the crash helmet with a sort of paper maché/glue combination with a trimmed down England party bowler hat left over from the recent World Cup as a starting point. 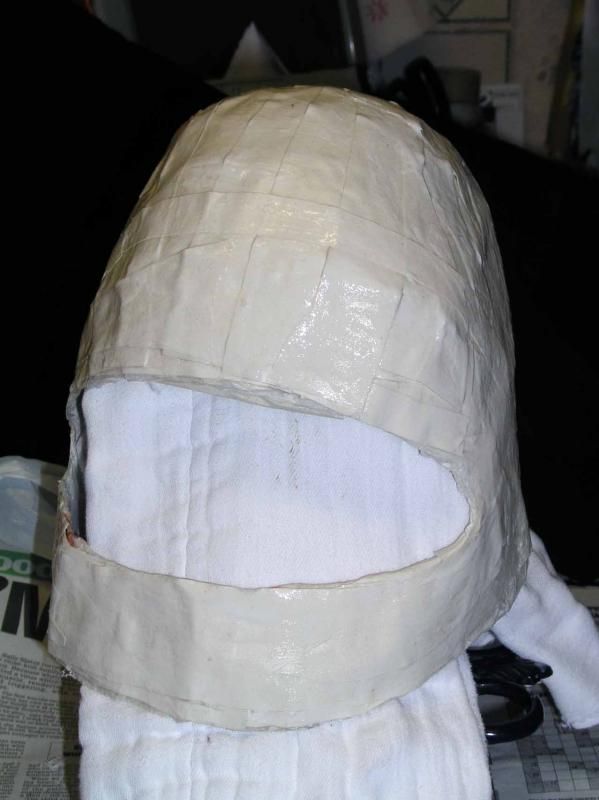 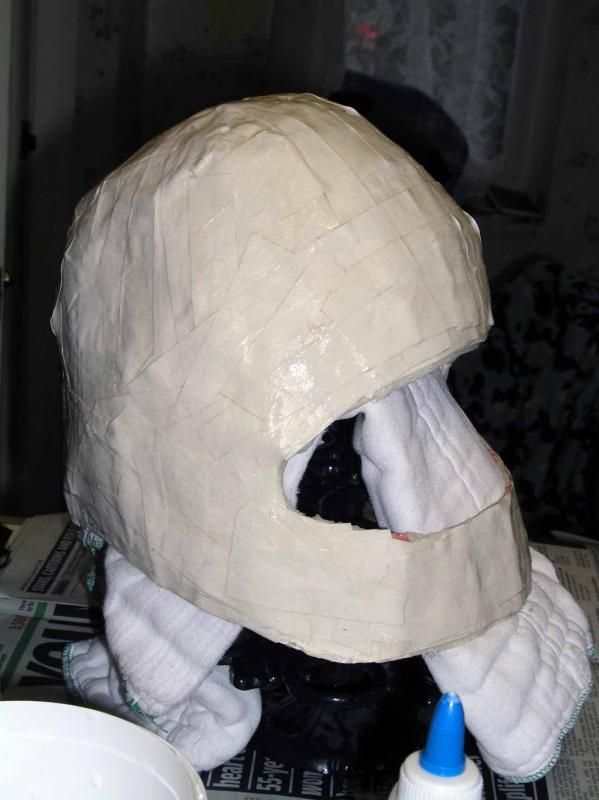 About 2 metres of 8mm threaded bar was bought to extend the steering, and getting the workshops at my place of work making up threaded 20mm sections to join the 50cm lengths of rods. You may note in the picture (for the sharp eyed) that I initially set up the steering upside down so when the steering wheel was turned the wheels went in the opposite direction! This had to be flipped and the main steering shaft from steering wheel to front axle had to be raised about 5cm to fit the hole (loop) on the horizontal steering bar (see incorrect set up on the photo). 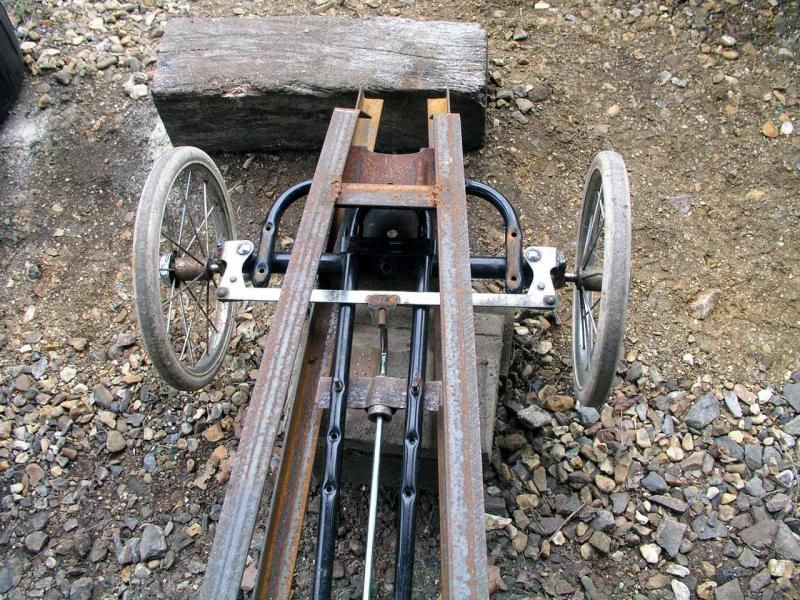 Upside down steering... Another busy Saturday with some more assistance from my father-in-law we made up the cockpit interior panels from an aluminium caravan gas bottle cover and an old (but serviceable) push along lawn mower gave up its handles to make the roll cage. I had sturdy steel angled brackets made up at the workshops to mount and support the gazebo poles which would be the struts for the rear wing. My first attempts were too flimsy and the brackets bent too easily. I then had the arduous job of drilling lots of holes in the frame ready for pop rivets which would hold the yet to be designed and printed body panels on. This was when I learnt how to drill metal, slowwwwly. 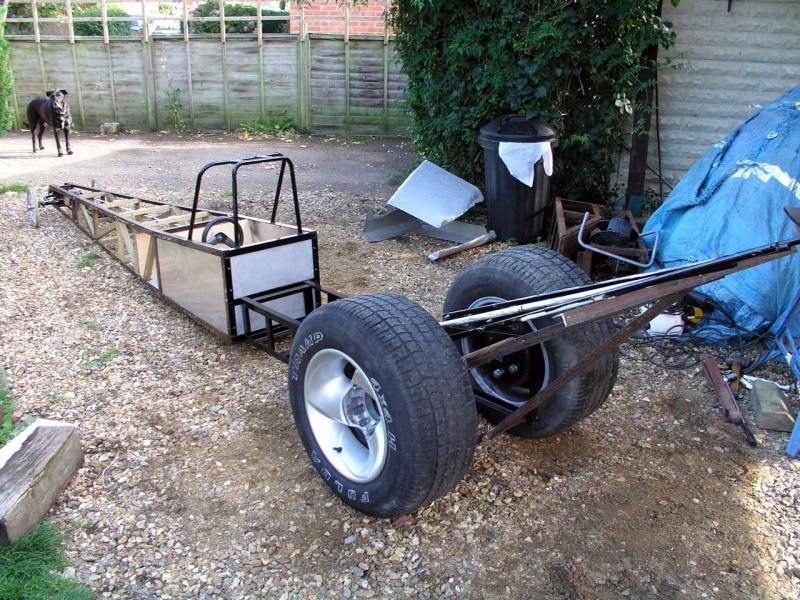 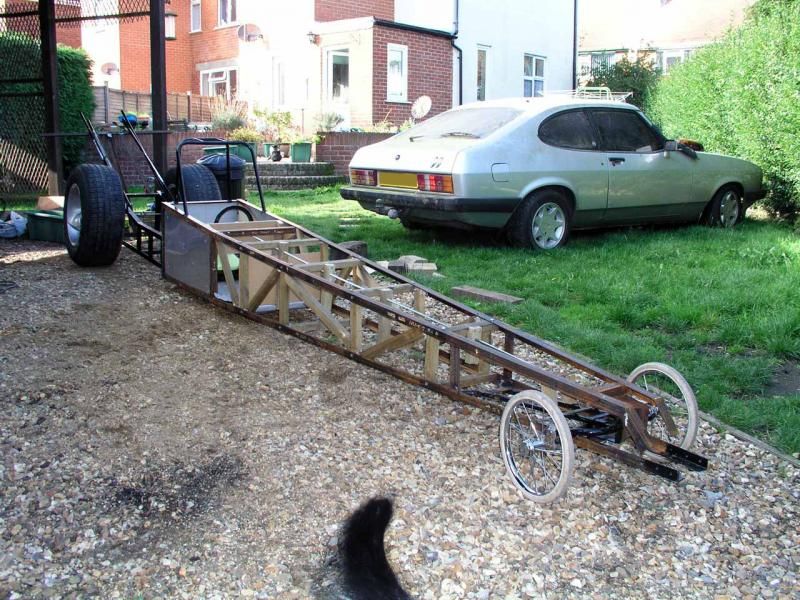 Next installment will be the engine build. Dom |
|